Looking to add a touch of nature-inspired beauty to your home? Look no further than macrame leaves (also know as macrame feathers)! The first time I tried my hand at this, I couldn’t believe how easy they were to make and how stunning they turned out. Now, I get compliments on my kitchen display all the time! In this blog, I’ll show you how to create your own macrame leaves, step by step. From choosing the right materials to mastering the knots, you’ll be crafting like a pro in no time. Let’s dive in and get knotty with some leafy goodness!
Deciding on the colour
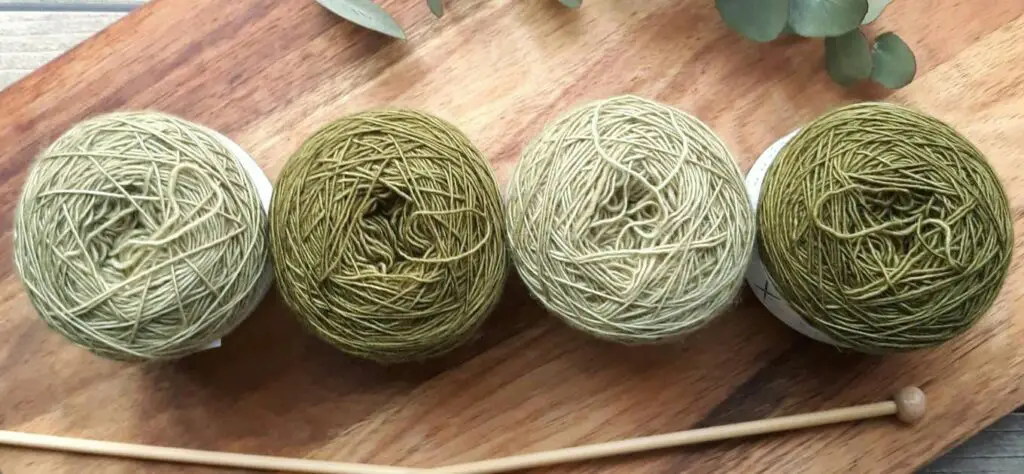
When it comes to choosing colours for your macrame leaves, the possibilities are endless! Think about the vibe you want to create. For a fresh, springtime feel, stick with shades of green—anything from soft sage to vibrant emerald works beautifully.
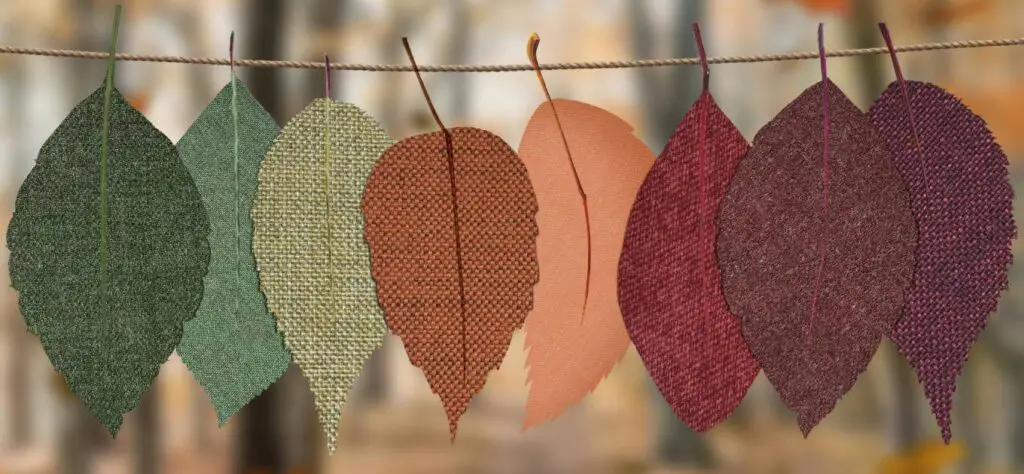
Or, embrace the cosy autumnal palette with warm oranges, browns, and golden yellows, bringing that crisp, fall feeling indoors. Feeling extra adventurous? Why not get creative and take inspiration from American Indian bird feathers? (see last image) Imagine elegant cream leaves with bold black tips for a dramatic, stylish twist. Whatever you choose, let your colour palette reflect your personal style and seasonal mood!
What to hang your leaves on
Before you start crafting your macrame leaves, it’s essential to decide what you’ll hang them on. Will you create a single statement leaf on a wooden ring or go bold with a group of leaves/feathers suspended from a beautiful branch? The possibilities are endless! You can use nature-inspired finds like driftwood or branches for a rustic touch, or for a quirky spin, even repurpose something like old drumsticks. Whatever you choose, the support you pick sets the tone for your design. For more inspiration, check out my blog on selecting the perfect support for your macrame wall hanging—there’s plenty of ideas to explore!
What you’ll need to make 1 macrame leaf
- Macrame Cord: 20 pieces at 20cm, and one piece at 40cm (4mm thickness)
- A Support: A branch, driftwood, or wooden ring depending on your design
- Two pins: To hold your cords in place while working
- Scissors: For cutting and trimming
- Comb: A pet hair comb works great for fraying the cords
- Ruler: To measure your cords and create your leaf stencil
- Cardboard: To cut a leaf-shaped stencil for trimming
- PVA Glue , Hair Spray or Fabric Stiffener: To help your leaf hold its shape
- Optional extras: Wooden beads or other decorations for added flair
How to Make a Macrame Leaf
STEP 1: Create Your Stencil
Before you begin, cut a leaf-shaped stencil out of a piece of cardboard. The size of your stencil will dictate the final shape and proportions of your macrame leaf, so take your time to get this right. Aim for a classic, organic leaf shape, but feel free to get creative. You can make it rounded, sharp, or elongated, depending on the look you’re going for.
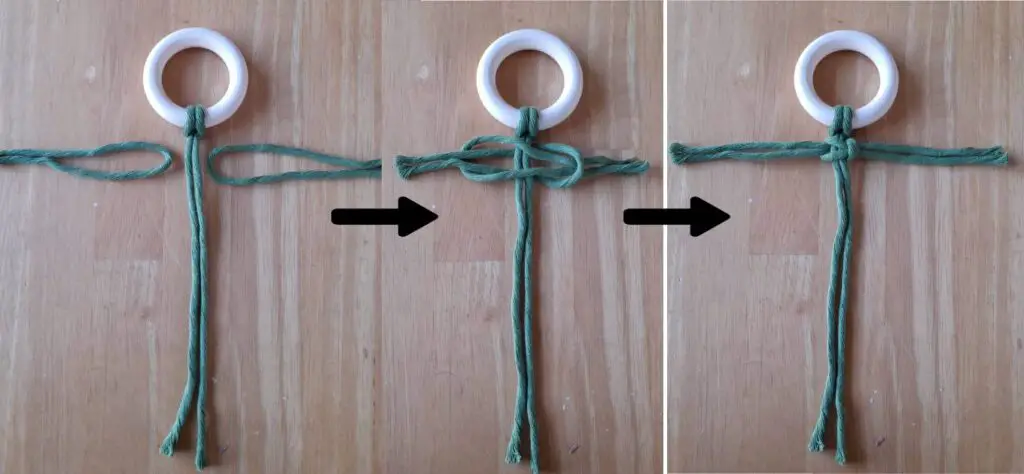
STEP 2: Attach the Spine
Take the 40cm cord, fold it in half, (and attach to the wooden ring using a lark’s head knot) and pin the folded loop at the top of your working surface using two pins. The loop will serve as the “hanging point” at the top of your leaf, while the two long ends form the spine. Keep it firmly in place with pins so the cord doesn’t move around as you work. This keeps your knots even and your leaf centered.
STEP 3: Knot Your Cords
Start with two of your 20cm cords. Fold both in half, creating loops. Place one cord under the spine and the other over it, aligning the loops. Pull the ends through each other’s loops, forming a lark’s head knot. Tighten this knot by gently pulling on the ends of both cords until it’s snug against the spine.
Repeat this process with the remaining cords and continue this pattern all the way down, ensuring the knots are secure and evenly spaced.
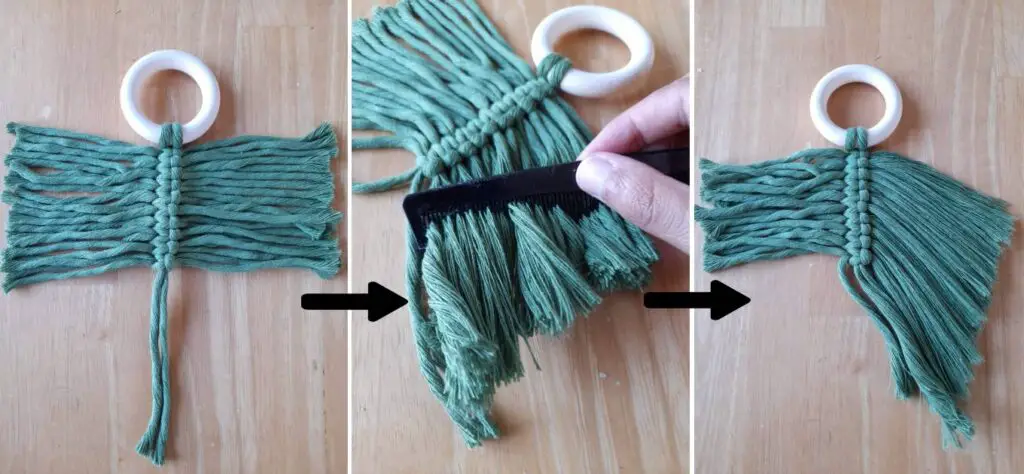
STEP 4: Fray the Cords
This is where the leaf gets its signature soft, feathery look. Use a comb (a pet hair comb works best because it has fine, sturdy teeth) to gently brush through the strands of each cord. Start at the bottom and work your way up, carefully separating the fibres. Be patient—it can take a little while to get all the strands loose and fluffy, but the result is worth it. The more you comb, the fluffier and more textured your leaf will become.
STEP 5: Add Structure
To ensure your macrame leaf holds its shape, you’ll need to apply PVA glue, fabric stiffener or hair spray. Lay the leaf flat and apply a light, even layer of glue or stiffener to both sides. This will give it some structure while maintaining its soft, frayed look. Leave the leaf to dry overnight. Once dry, it will be more rigid and easier to cut and hang without losing its form.
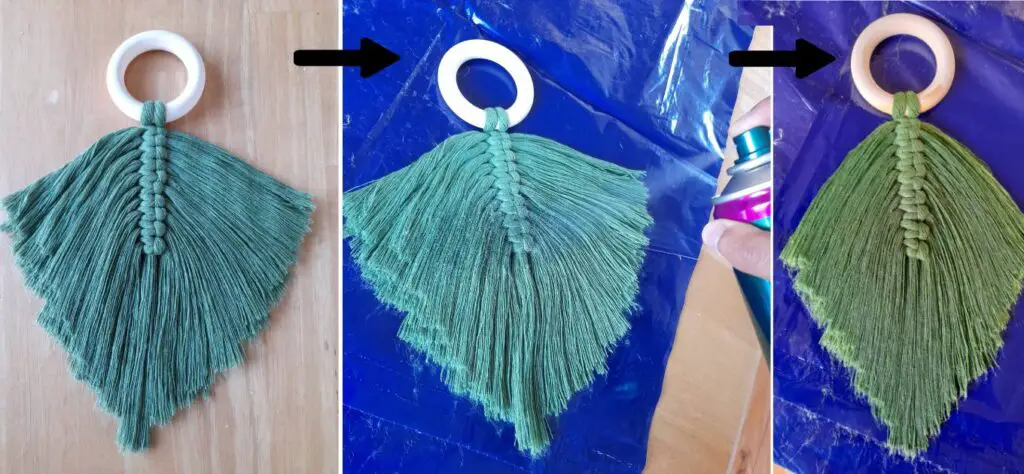
For a natural look, keep the glue thin so the leaf remains slightly flexible. For a more sculptural finish, you can apply a thicker coat.
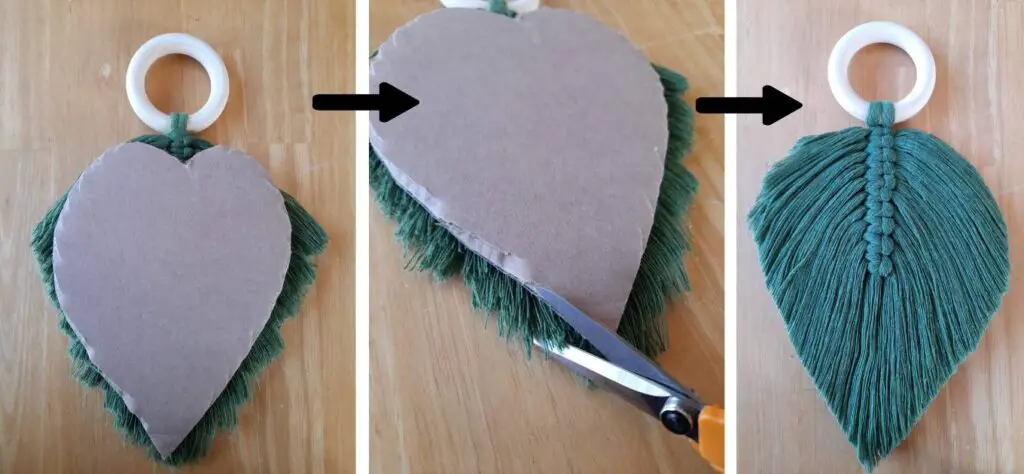
STEP 6: Shape the Leaf
Once all your cords are knotted and secured to the spine, it’s time to shape your leaf. Place your cardboard stencil over the cords and use scissors to trim them into the desired leaf shape. Follow the lines of your stencil for a clean and symmetrical shape, or if you prefer a more organic look, freehand the trimming for a natural, uneven edge. Don’t worry if it’s not perfect—real leaves aren’t either!
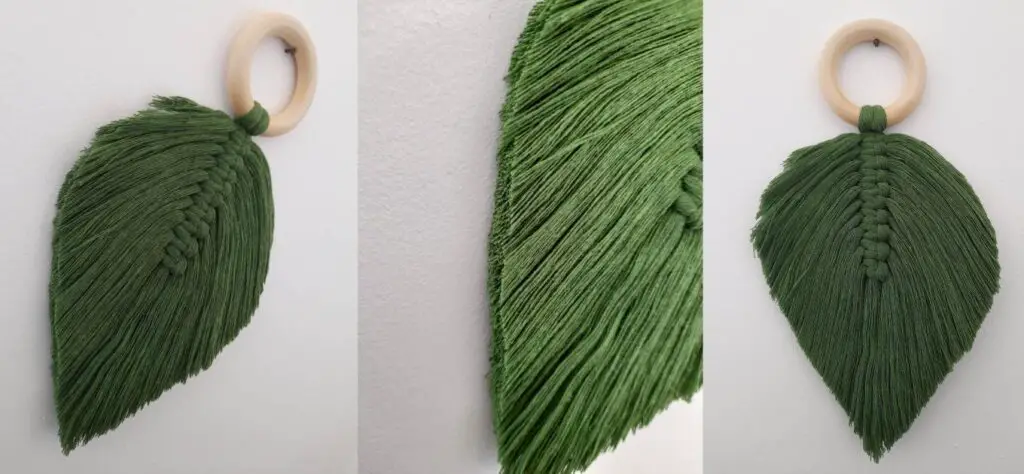
STEP 7: Hang It Up
Once your macrame leaf is dry and shaped, it’s ready to be hung! If you’re making multiple leaves, you can suspend them from a quirky branch, driftwood, or even a repurposed item like a drumstick for a unique touch. Arrange the leaves at different heights to create a dynamic, flowing design.
STEP 8: Optional Embellishments
Want to give your macrame leaf an extra bit of character? Consider adding some wooden beads to the hanging cord or the base of the leaf. Beads can bring an added element of texture and interest, elevating your macrame creation from simple to striking. You can even mix in different coloured threads or metallic beads for a modern, boho vibe.
And Voila! What do you think?
Final Thoughts
Making macrame leaves is such a quick and easy project—perfect for cosy autumn evenings when the nights start drawing in. It’s a great way to bring a touch of nature indoors, and even better, it’s a craft the whole family can enjoy! Why not get the kids involved and let them choose the colours or help with fraying the leaves? I’m excited to try something new by using twigs as the spine to create a vase full of macrame leaves—imagine the rustic charm! Wish me luck, and I hope you have fun creating your own macrame masterpiece! Don’t forget to leave me a comment and share your experience!
FAQs
What do you use to stiffen macrame leaves?
To stiffen macrame leaves, fabric stiffener or diluted glue is commonly used. Applying a light coat helps maintain the shape while preserving the natural look. Once applied, leaves should be allowed to fully dry before adjusting the final shape.
What do I need to make macrame leaf?
To make a macrame leaf, you need cotton cord, scissors, and a comb for fraying. A key ring or wooden dowel can serve as a base, while fabric stiffener is optional for shaping. Basic knowledge of knotting techniques is also required to craft the leaf design.
What string to use for macrame leaves?
For macrame leaves, soft cotton string is most commonly used. Its texture allows for easy fraying, which creates the desired feather-like effect. Thicker cords result in fuller leaves, while thinner cords give a more delicate appearance.
Love what you see? Please share!