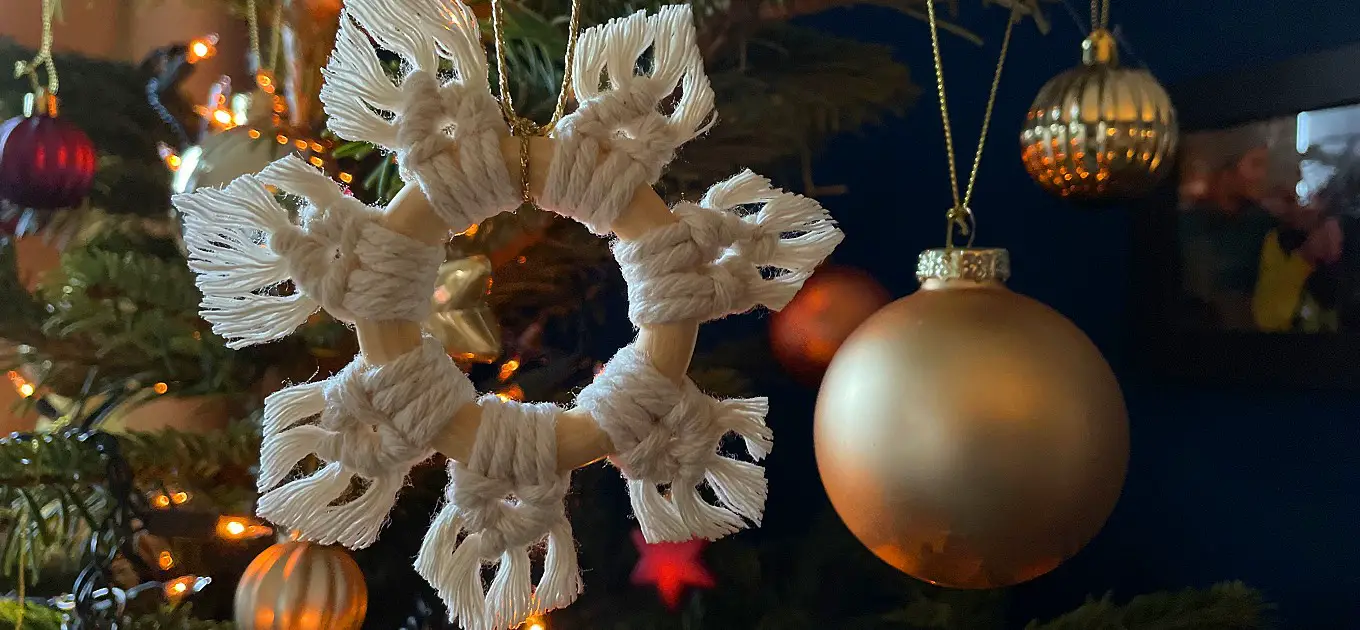
How to Make a Macrame Snowflake in just 15mins!
December 10, 2023 by Kate
Picture this: Christmas vibes, snuggling by the fire with a toasty cocoa in hand, maybe diving into a jigsaw while dipping into a massive tub of Quality Streets—total coziness, right? Now, imagine adding a dash of creative fun to the mix! Enter the realm of macrame snowflakes, the whimsical touch your home deserves. And guess what? It’s a speedy 15-minute ride to crafty wonderland! So, grab your supplies, crank up the festive tunes, and let’s Deck the halls with knots of macrame!
What do I need to make a Macrame Snowflake?
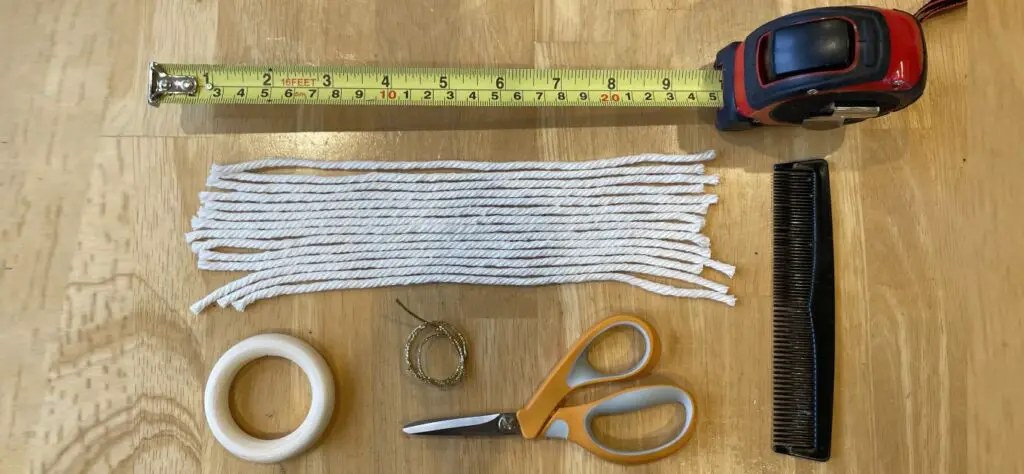
- 3mm White Macrame Cord: 14 pieces at 25cm long
- Gold Cord at 25cm long
- Wooden Ring: 5cm in diameter
- Scissors
- Ruler
- Hair Spray (preferably Extra Strong Hold)
- Comb or Pet hair Comb
Step by Step Tutorial
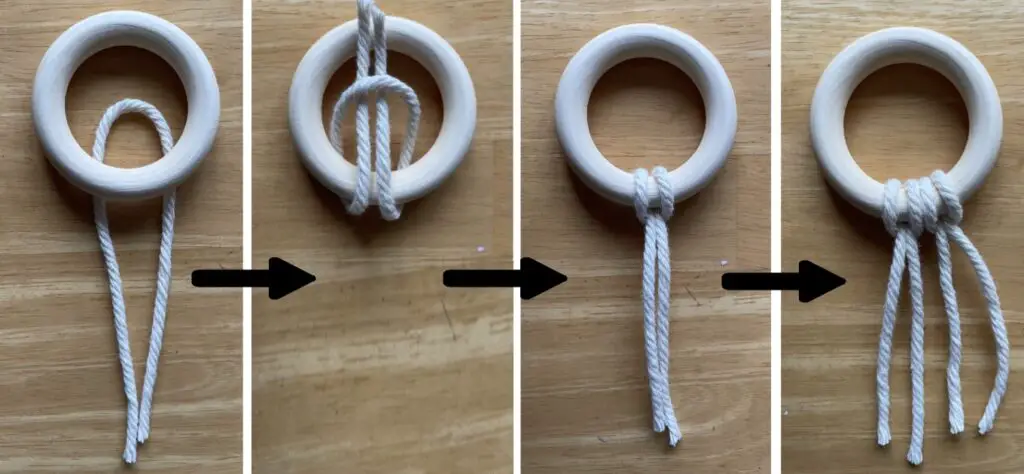
Step 1: Attaching the Cord to the Wooden Ring
Let’s start with a Lark’s Head knot. Take a cut piece of white cord, fold it in half, and create a loop by uniting the ends. Position the loop behind the wooden ring and guide it through, keeping the folded part forward. Pull both loose ends downward through the loop and secure the knot with a gentle tug. Ensure it fits snugly against the wooden ring. Now repeat this process with the remaining pieces until the wooden ring is full.
Step 2: Double Half Hitch knot
The Double Half Hitch knot may seem deceptively simple, but it’s a powerful technique to secure your macrame rows. Begin with four cord sections, creating a 4-shape with your outer left cord, which serves as the holding cord for the row.
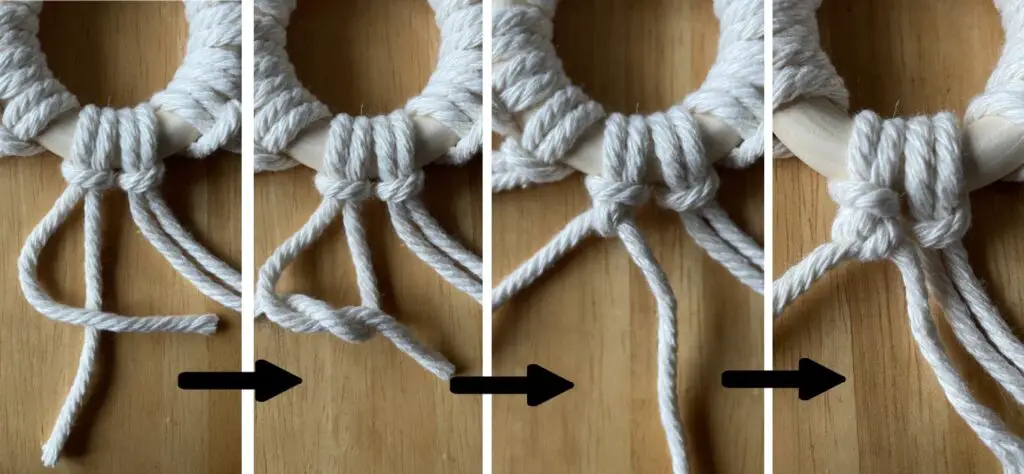
Now, take the cord next to the outer left and weave it through the 4-shape, going over and under the holding cord. The working cord should loop securely around the holding cord. Bring the holding cord up, indicating the desired direction of the line. Begin gently rolling the working cord upwards, ensuring the loop maintains its shape.
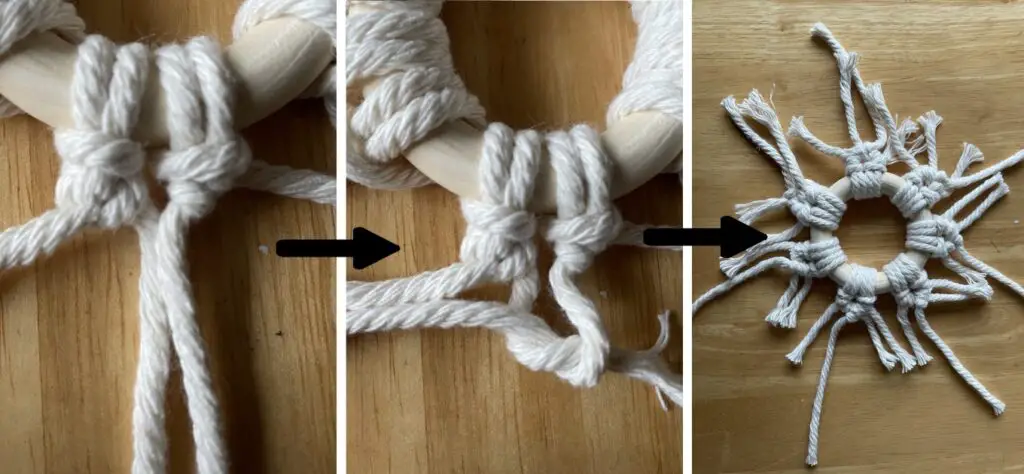
Repeat this process for the next cord, creating a row of Double Half Hitch knots. Once done, do the same for the two cords on the right. Before proceeding, confirm there’s no gap between your Lark’s Head Knot and the first Half Hitch Knot. Repeat this step for all the other pieces of cord until you have seven sections.
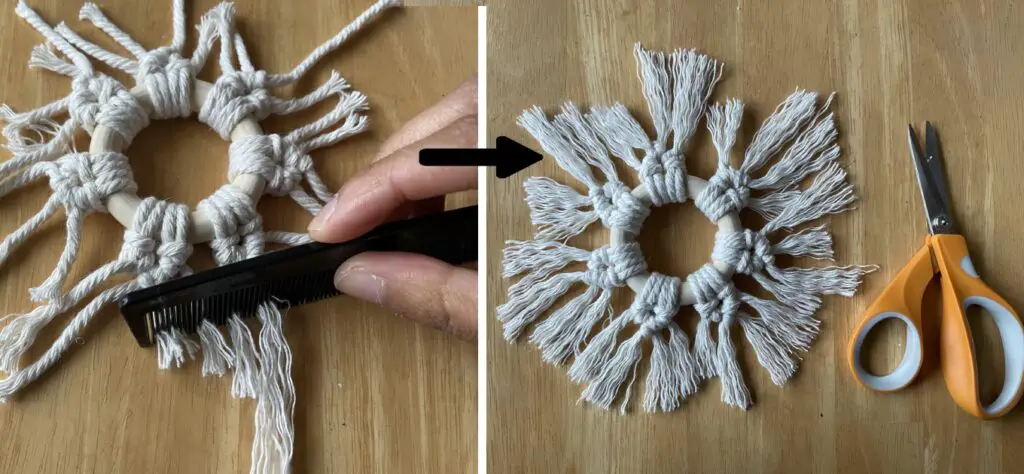
Step 3: Creating a Fringe Effect
Now, it’s time to add a touch of flair. Grab a comb or a pet hair brush, and start combing each cord to fashion a stylish fringe effect. Repeat this process for all pieces of cord. Feel free to trim any excess fringe and round-off your snowflake.
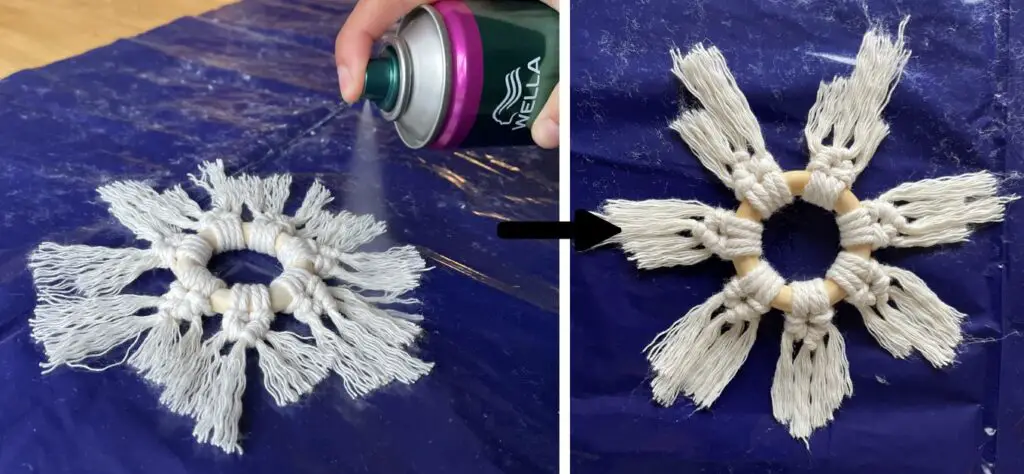
Step 4: Setting with Hair Spray
Take your macrame snowflake to a well-ventilated area for the final steps. Spray one side generously with hairspray, brush it neatly, then flip it over and repeat the process. Use the back of the comb to smooth each section of fringe. Allow it to air dry for a few hours.
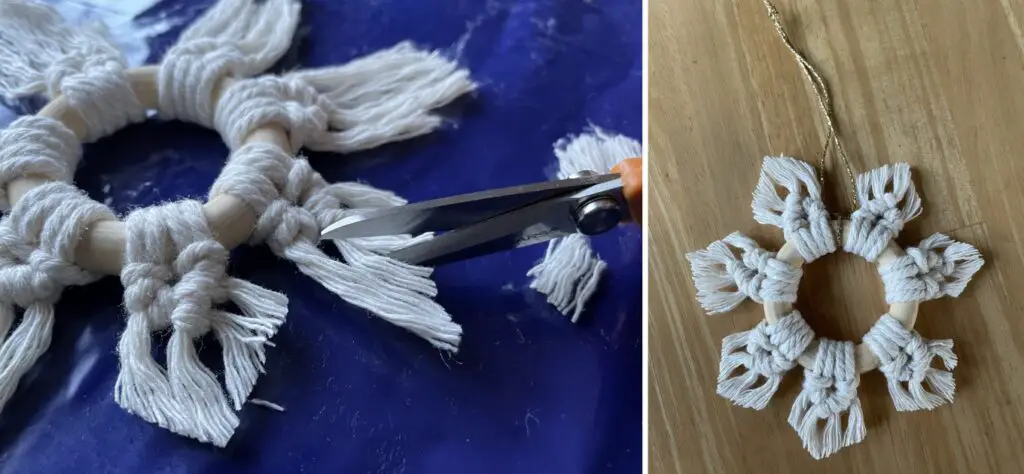
Step 5: Trim to Finish!
Once your macrame snowflake is dry, trim and refine the fringe ends to achieve the perfect look. Then, craft a loop with the gold cord and securely tie it. Your elegant creation is now ready to adorn your space with a touch of festive charm.
Final thoughts
If you enjoyed this or crave something different, why not expand your repertoire with more macrame Christmas decorations? Explore my other blogs on crafting a macrame angel and fashioning a macrame Santa decoration for a festive touch that complements your style!
See, I told you it was easy! Now, why not infuse even more festive charm? Experiment with different coloured cords or add a sprinkle of glitter spray for that extra dazzle. It’s a fantastic project to get your children excited and makes for a thoughtful and personal Christmas gift. If you find this tutorial challenging, please refer to this amazing video by CraftsbyMeelespea.
More Articles