How to make a Macrame Christmas Santa Decoration
November 1, 2023 by Kate
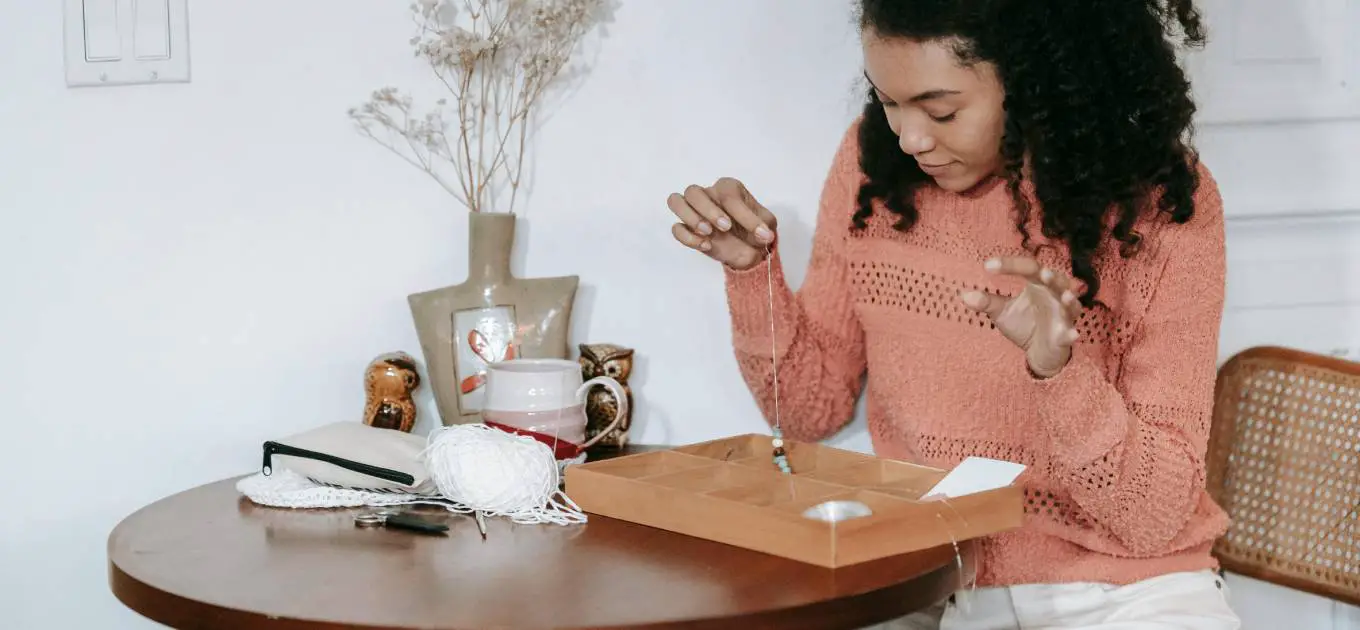
If you’ve read my blog on ‘How to make a Macrame Angel,’ you already know just how much I cherish the festive season. There’s something truly special about the holidays, isn’t there? It’s a time when we gather with our loved ones to create, be merry, and exchange heartfelt gifts.
But, you know, there’s another thing I absolutely adore about this season – cosiness. Picture this: the snug embrace of a chunky knit festive jumper, a warm cup of hot chocolate cradled in your hands, the crackling of an open fire, and the soft twinkle of Christmas lights all around!
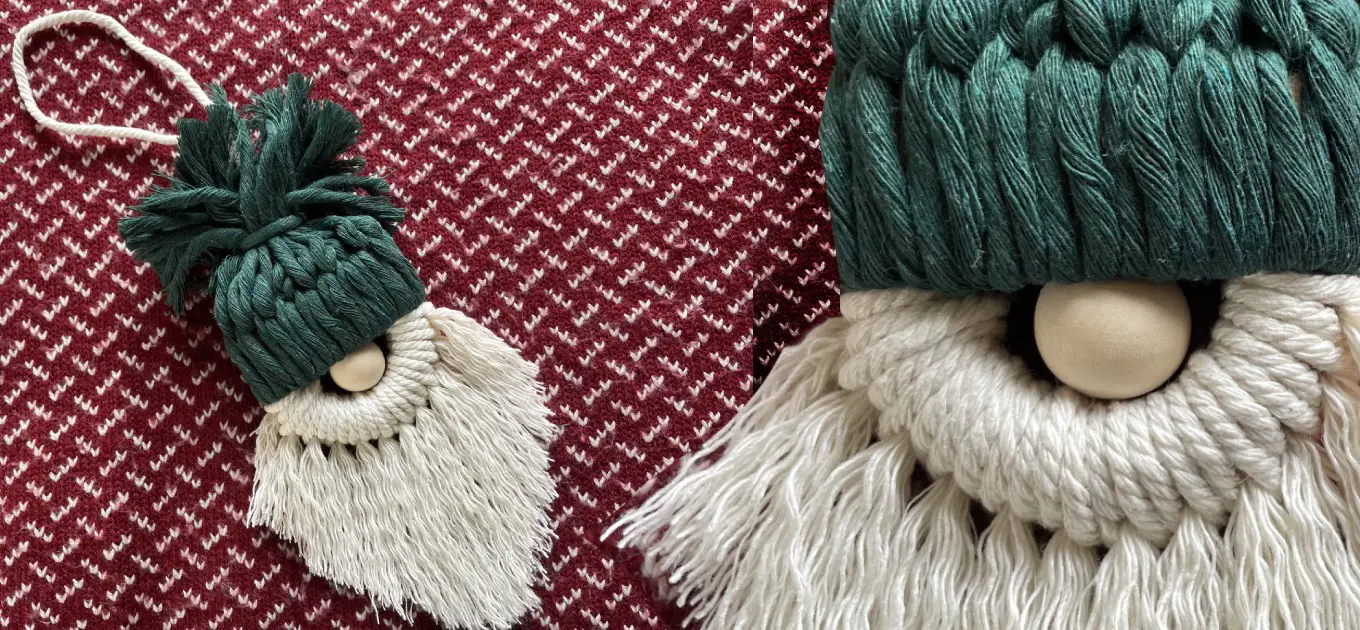
If this cosy, heartwarming ambiance sounds familiar to you, then you’ll understand why I couldn’t help but fall in love with these cute little macrame Santa decorations on social media. They exude that same cosy charm with their chunky knitted hats and big bushy beards. And what’s more, you only need to master one macrame knot; the ‘Larks Head’ knot!
So, join me as I guide you through this easy tutorial to create your very own Macrame Christmas Santa Decoration or Gonk. Together, we’ll bring a touch of warmth and cheer to your holiday season. Let’s go!
What do I need to make a Macrame Christmas Santa?
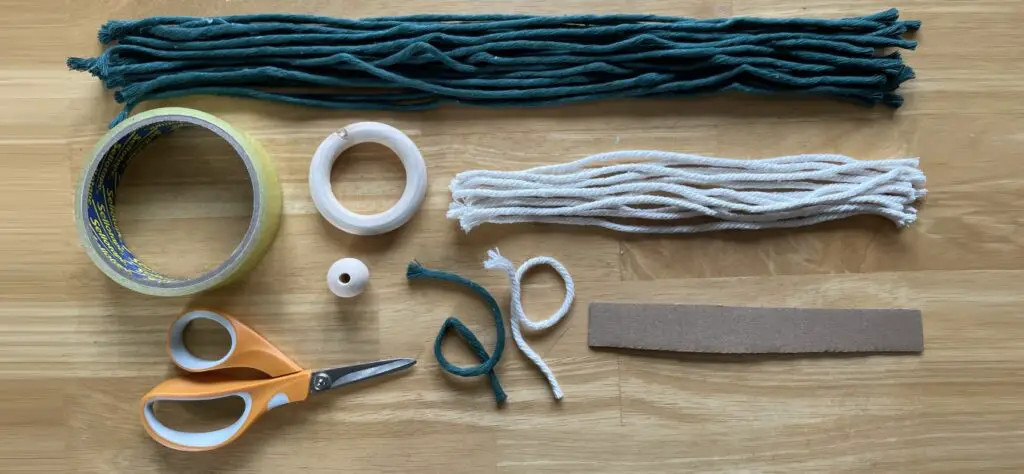
- White Macrame Cord: 12 pieces at 25cm, and one piece at 30cm
- Coloured Macrame Cord: 20 pieces at 40cm, and one piece at 20cm
- Wooden Bead: 2cm in diameter
- Wooden Ring: 5cm in diameter
- Cardboard or Toilet Roll: 20cm x 2cm
- Scissors
- Ruler
- Cellotape
How to Make a Macrame Christmas Santa
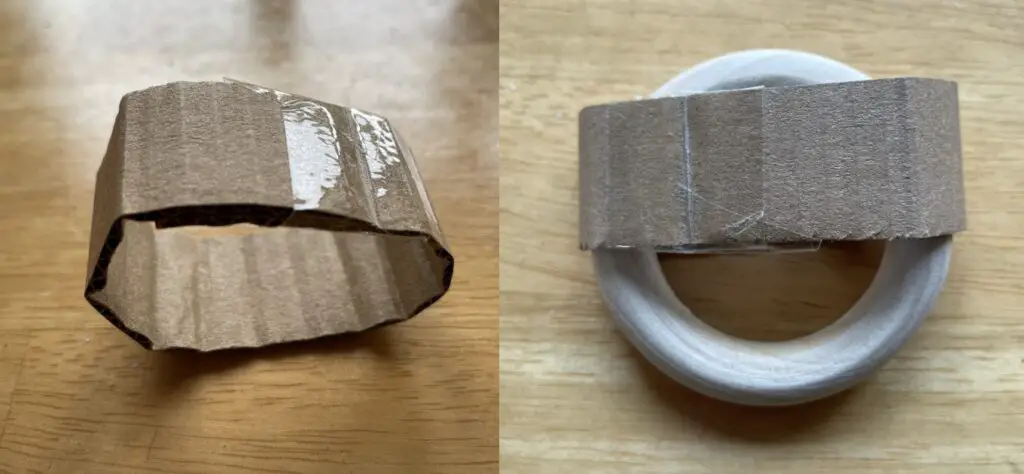
Step 1: Creating Santa’s Hat
Using the cardboard (or toilet roll) and some cellotape, fashion a loop that fits snugly over the wooden ring. This loop will be the bottom of Santa’s cosy hat.
Step 2
Take your coloured cord and create a larks head knots to attach it securely to the cardboard. Begin by folding the cord in half, uniting the ends to form a loop. Position this folded loop in front of the cardboard, and gently guide the loop behind, keeping the folded part at the forefront. To secure the knot, pull both loose ends of the cord downward through the loop. With a delicate tug on both ends, make sure the knot fits snugly against the cardboard.
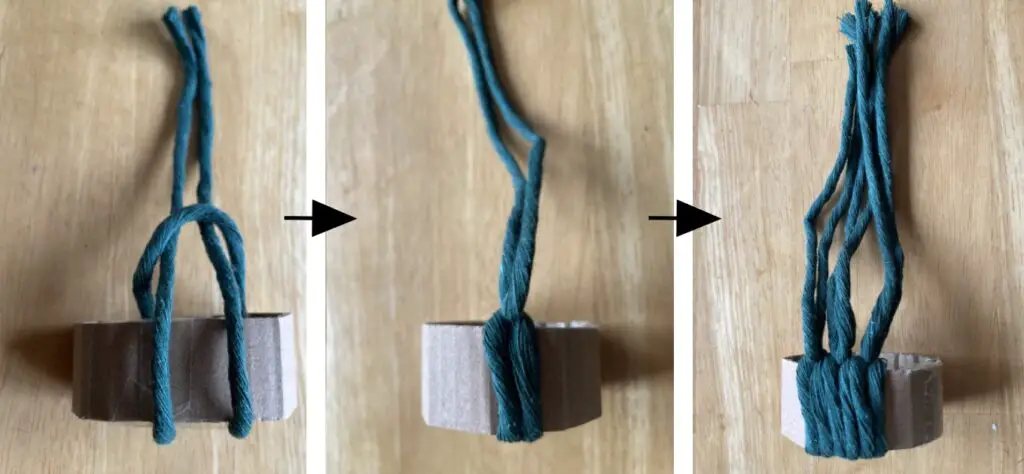
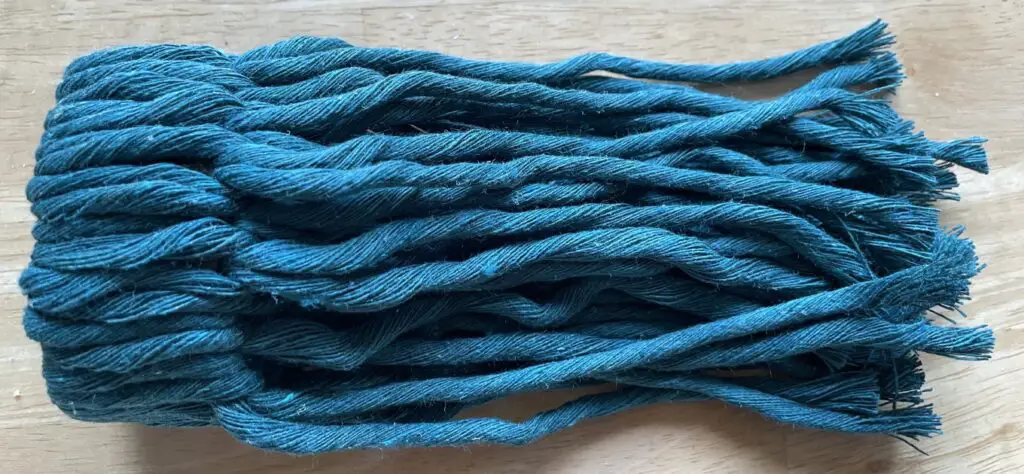
Repeat this method with all the remaining coloured cords until the entire cardboard loop is filled. And now, we’re ready to move on to crafting Santa’s beard.
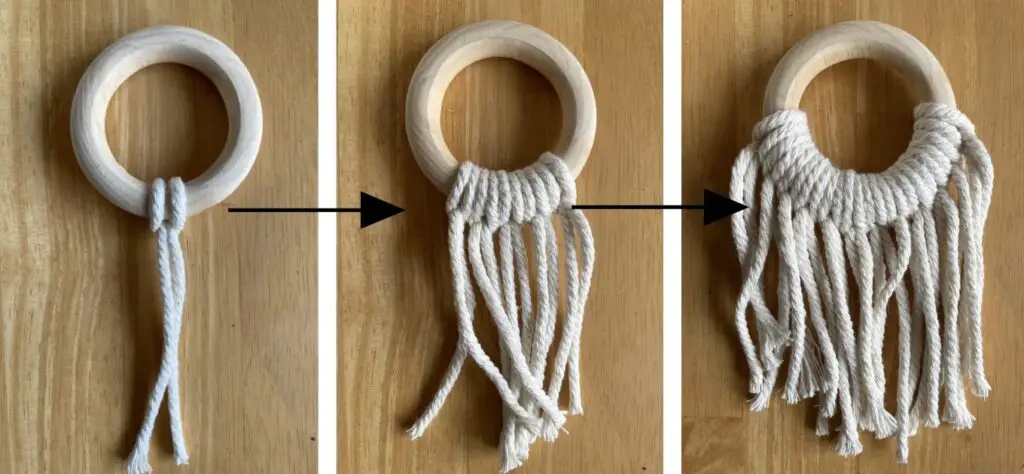
Step 3: Forming Santa’s Beard
With Santa’s hat coming together nicely, it’s time to give him his iconic white beard. Take your white cord and attach it to the wooden ring using larks head knots, just as you did for the hat.
Repeat this process with all 12 pieces of the white cord until Santa’s beard is complete.
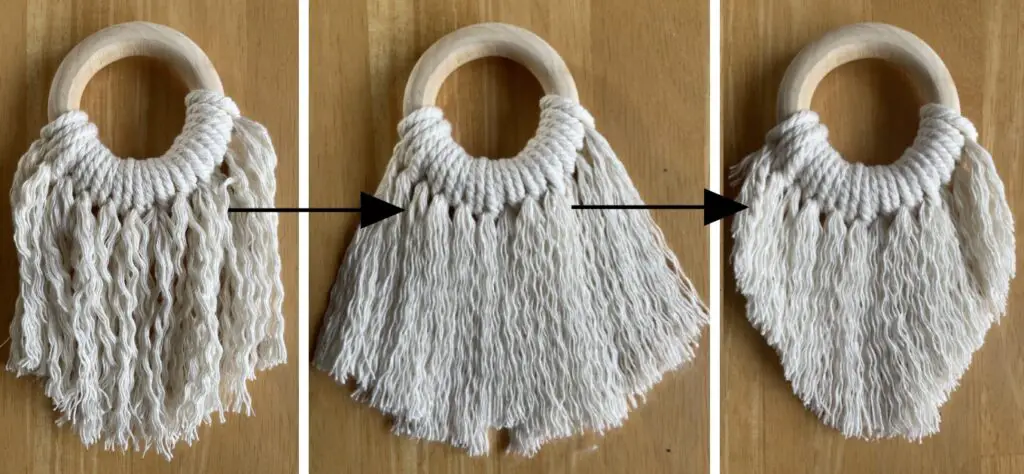
Step 4
Carefully unravel the white cord of Santa’s beard. Then, using a comb or a pet hair brush, gently brush the unraveled cord until it achieves the desired fullness. This step allows you to customise Santa’s beard, adding character and texture. Once you’ve brushed it out, trim the beard to your desired length.
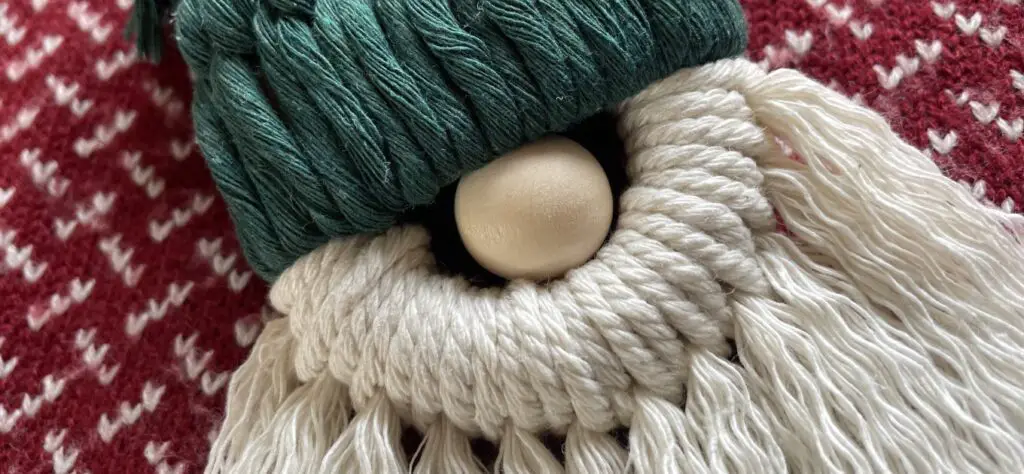
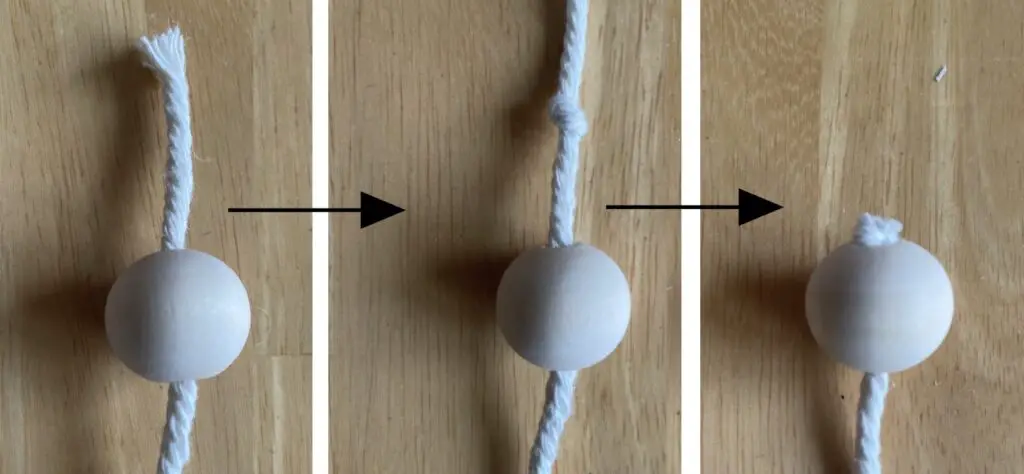
Step 5: Adding Santa’s Nose
Slide the wooden bead onto the 30cm white cord. Tie a knot just above the bead to hold it in place. Feel free to add a blob of PVA glue if you have any.
Next, place the wooden bead in the centre of the ring and loop the cord around it to your desired length. If possible, try and position this bead so it is just resting on the white beard.
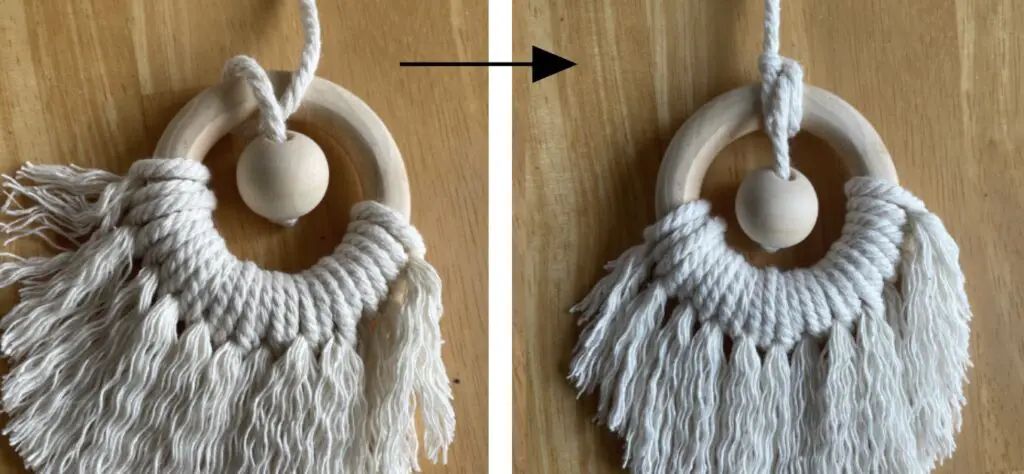
Step 6: Bringing it all together!
Here comes the fun part – it’s time to bring it all together!
Begin by gently sliding the crafted hat onto the wooden ring, allowing it to nestle in place. Next, thread the 30cm cord through the center of the hat, securing it snugly. To complete Santa’s hat, use the 20cm coloured cord to gather the hat cords together and tie a secure knot. Trim the hat to your desired length.
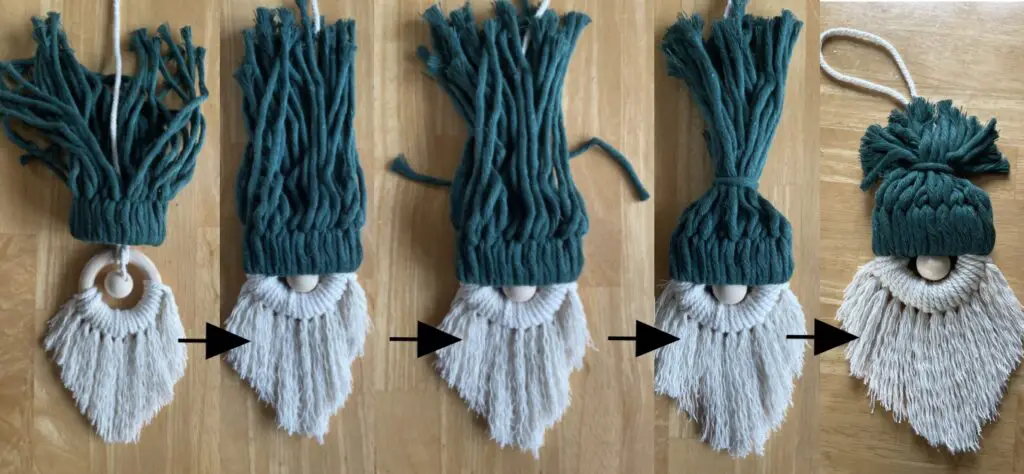
Step 7
Tie a loop in the 30cm white cord so you can hang it up. For an added touch of durability, consider using a glue gun to secure all the elements in place, ensuring your Macrame Christmas Santa stands the test of time.
Feel free to experiment with different coloured cords for the hats, letting your creativity shine. If you’re feeling adventurous, why not add some wooden beads onto the hat for an extra layer of detail. The possibilities are endless – let your creativity roam free.
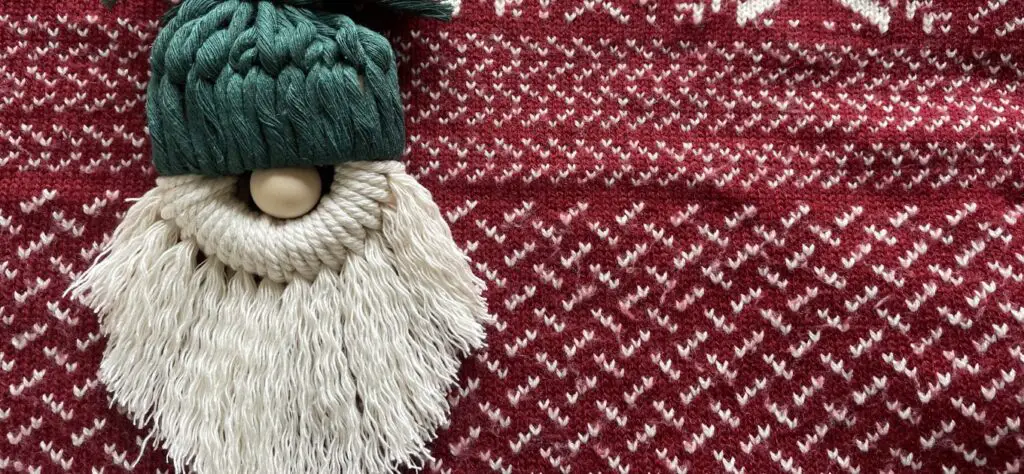
And there you have it, your perfect Macrame Christmas Santa Decoration!
Final thoughts
Crafting your Macrame Christmas Santa Gonk offers a delightful opportunity for festive family bonding, especially involving kids. However, exercise caution, particularly when using scissors.
These Santas are not only adorable but versatile too; their charm easily transforms into a timeless Garden Gnome Gonk vibe, suitable for year-round display. And what’s more, I managed to repurpose the offcuts from my previous macrame projects for the white macrame cord, making this a sustainable and cost-effective DIY!
If you find the process challenging, refer to the video below for step-by-step guidance. Happy Holidays!
More Articles